

There are many ways to incorporate authentication into your applications. OAuth is one of those ways.
OAuth is a technological standard that allows you to share information between services without exposing your password.
OAuth will allow us to leverage the authorization workflows of major web services. Some of these web services are Google, Facebook, and GitHub. This process supplies us with security and robustness because we don't manage passwords.
1. Sign up for Supabase and create a project.
Go to http://supabase.com and sign up for an account. Create a new project in the dashboard.
2. Create a user table
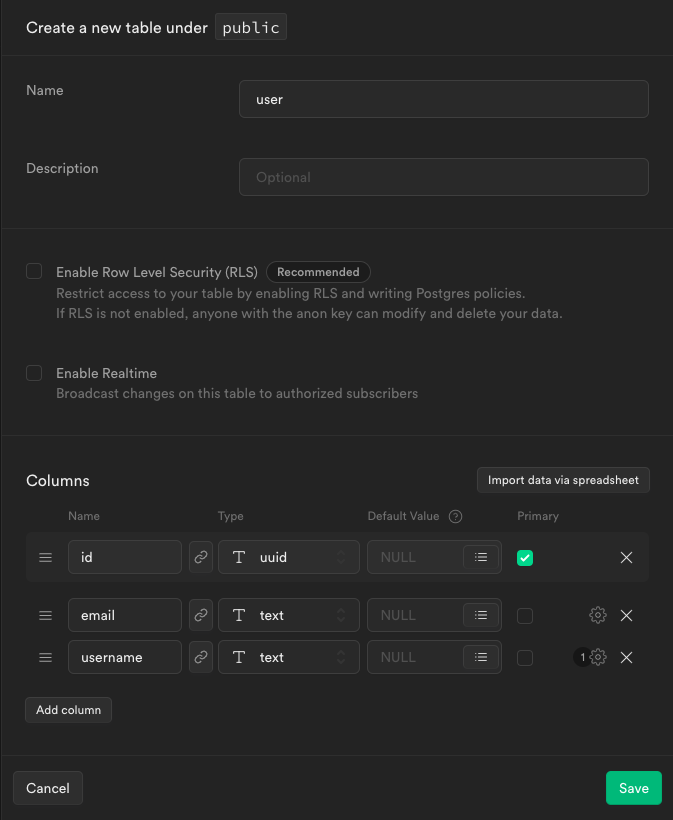
You'll likely need to hold some set of data about your users. Add the columns you'd like to hold about them here. Go to the Table Editor tab and click on Create a new table.
Supabase uses PostgreSQL. You may need some knowledge about managing relational database systems. I'll be adding 3 columns to mine: id (uuid), email (text), and username (text).
3. Configure OAuth in Supabase
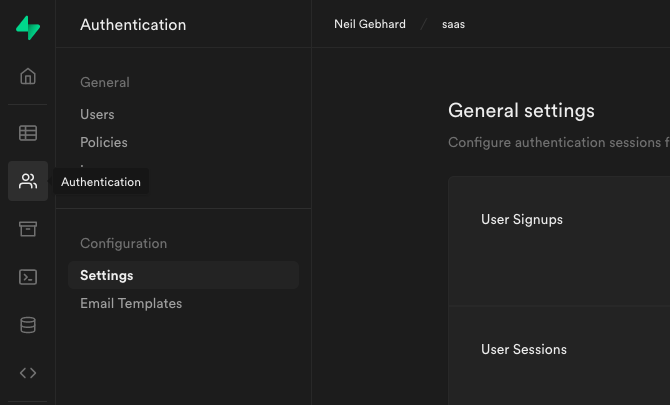
Go to the Authentication page and navigate to the Settings tab. Find the OAuth provider you'd like to use and enable it. I'll enable GitHub.
4. Configure your application with the OAuth provider.
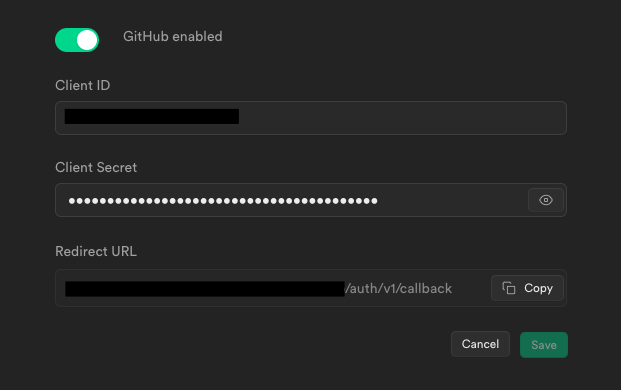
You'll need to register your application with your select OAuth provider(s). They'll need certain information like your homepage URL and callback URL. For the homepage URL, use http://localhost:3000 in development. For production, use your deployment URL. The callback URL should be your Supabase API URL with the /auth/v1/callback path.
Grab the client ID and client secret from the OAuth provider and insert them into your Supabase OAuth settings.
5. Create a trigger that adds a user to the user table upon signup
Signing up a user with OAuth adds a row to the auth.users table. The columns of this table are not modifiable. Also, this table is not accessible via API. To circumvent this, we can use a trigger that activates on insert to the auth.users table. This trigger will add a new user to the public.user table.
In Supabase, go to the SQL Editor page and select New query.

Then add this trigger to your SQL query.
-- inserts a row into public.users
create function public.handle_new_user()
returns trigger
language plpgsql
security definer set search_path = public
as $$
begin
  insert into public.user (id, email)
  values (new.id, new.email);
  return new;
end;
$$;
Make sure to run your SQL trigger statement.
6. Set up the Supabase client in Next.js
For this step, let's create a Next.js app with create-next-app.
npx create-next-app
Inside your project, install the Supabase client library.
npm i @supabase/supabase-js
Then, insert a .env.local file in the root of your project.
touch .env.local
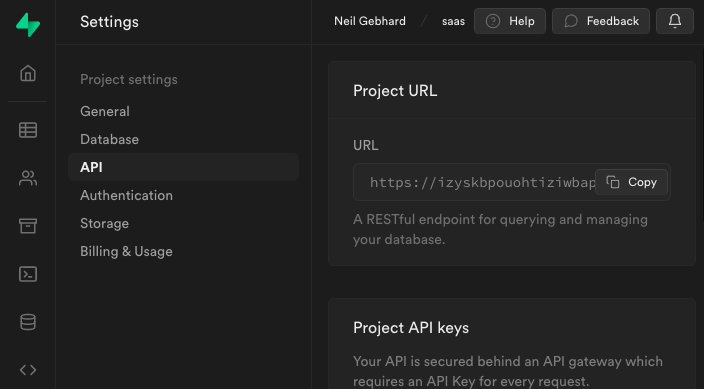
Next, create two environment variables inside your .env.local file to store information about your Supabase project. Find these in the API tab in your Settings page.
NEXT_PUBLIC_SUPABASE_URL=[SUPABASE_URL]
NEXT_PUBLIC_SUPABASE_API_KEY=[SUPABASE_API_KEY]
Now, we need a way to a way to access your Supabase data inside your application. We'll set up a singleton Supabase client to do that. This is a common pattern for accessing Supabase.
import { useEffect, useState } from 'react'
import { createClient } from '@supabase/supabase-js'

const supabase = createClient(
  process.env.NEXT_PUBLIC_SUPABASE_URL,
  process.env.NEXT_PUBLIC_SUPABASE_API_KEY
)

const useSupabase = () => {
  const [user, setUser] = useState(null)
  const [session, setSession] = useState(supabase.auth.session())

  supabase.auth.onAuthStateChange(async (_event, session) => {
    setSession(session)
  })

  useEffect(() => {
    const getUser = async () => {
      if (session?.user.id) {
        const { data: currentUser } = await supabase
          .from('user')
          .select('*')
          .eq('id', session.user.id)
        setUser(currentUser)
      }
    }
    getUser()
  }, [session])

  return { user, session, supabase }
}

export default useSupabase
7. Set up a login page
Let's create a login page to log in to our app. I'm using Github as the OAuth provider. You can add or use any other OAuth provider to handle your login. Find more information about using OAuth providers in Supabase.
import useSupabase from '../lib/useSupabase'

const Auth = () => {
  const { supabase } = useSupabase()

  const handleClick = () => {
    supabase.auth.signIn({ provider: 'github' })
  }

  return (
    <>
      <h1>Sign up</h1>
      <button onClick={handleClick}>Sign in with GitHub</button>
    </>
  )
}

export default Auth
Now the rest is up to you. Add your business logic to your application. An example of accessi
import useSupabase from '../lib/useSupabase'

export default function Home() {
  const { session, user } = useSupabase()

  return (
    <>
        {session ? <code>{JSON.stringify(user, null, 2)}</code> : <p>User is not logged in</p>}
    </>
  )
}
Thank you for reading.
Resources
- Example Project on Github
- Supabase Auth
- Supabase Database
- Supabase Row Level Security
- Supabase Managing User Data